Tag Archives: game

Roast Saddle of Hare

Note: This entry has been restored from old archives.
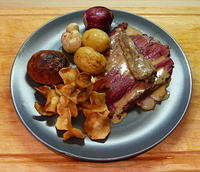
Roast Saddle of Hare

Last weekend I covered the stock I made with the hare offcuts and forelegs, now I’ll get on with a description of the prime meal our hare gave us: Roast Saddle of Hare. This is the second recipe (in this case maybe production is a more accurate term) in my Harey Weekend series. I took a rather straightforward path with this one, marinating the saddle for a couple of hours in herby olive oil, barding with streaky bacon, and roasting it along with some garlic, onions and new potatoes. I also prepared steamed yeasty, herby dumplings, making up a recipe on the spot for them, and crispy parsnip chips.

As far as cooking times and general information goes, the books I consulted were the usual The River Cottage Meat Book, as well as The Game Cookbook. Both were a little light on roasting information unfortunately, my approach to roasting the beast was mainly informed by the Meat Book though I extended the time given by Hugh just a little (and I don’t think you’d want the hare any rarer than we had it.) I also took Hugh’s advice on board and didn’t marinate (“pickle”, he says) the meat in wine beforehand, choosing instead plenty of oil. The Game Cookbook, as usual for game, provides the better and most complete back-story on the history of eating, and mythology of, hares. While The Meat Book, I found, gave slightly better detail on working with the hare. Clarissa gives many more recipes than Hugh though, The Meat Book has only a single hare recipe: Jugged Hare. Which is the classic hare dish, there’s a version in both books and they’re very different. The instructions I have here are, I believe, sufficient for the roasting – so if you’re after a book that gives hare a more detailed coverage I’d recommend The Game Cookbook out of the two.
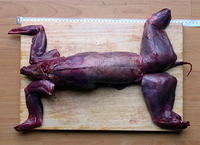
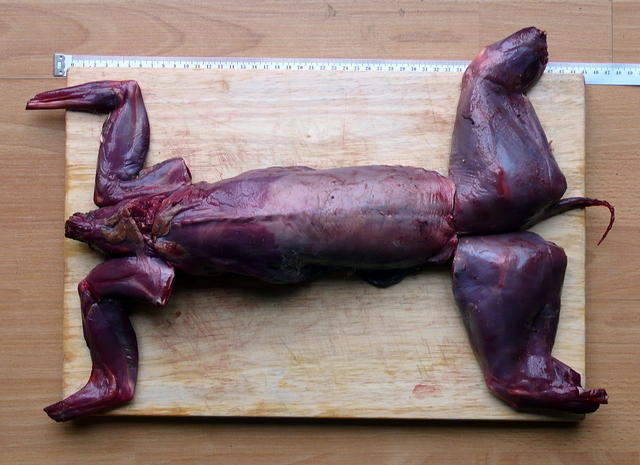
Hare, saddle in middle

As far as the timing goes the first thing I did was marinate the hare about two hours before roasting it and then prepared the dumpling dough. Next, 30 minutes before roasting the saddle, I put the potatoes into the hot (200°C) oven to pre-roast a little. Just prior to roasting I unwrapped and barded the saddle and stuck it into the oven, which was boosted to 220°C, and threw the onions and garlic in with the potatoes. Total hare roasting time was only about 25 minutes, though the vegetables stayed in the oven for a further 20 minutes after the hare was removed. The final 20 minutes was the busiest, hare out of the oven, dumplings into the steamer, parsnips chips shallow-fried in batches, juices reduced with added double cream for a sauce. Around 3 hours end-to-end but only the last hour was particularly busy.

A 600g hare saddle serves two well and could do three at a pinch, but would be stingy for four (get two saddles then.) We got enough meat out of this for dinner and, thanks to plenty of sides, had a little left over for a salad the next day. For a larger roast (to serve four comfortably) you could include the rear legs, which are very meaty. It’s said that they tend to be dry though and work better for a casserole, which is what I did.

Anyway, the first thing I did was…

Marinating the Saddle
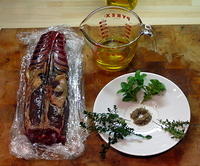
Premarinade

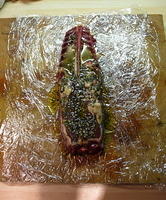
The butcher had jointed the hare for me, as shown in earlier photos, but the saddle still had some rough ends and the full rib enclosure, as well as the liver (lucky us to have an understanding butcher!) I cleaned up each end of the saddle, trimming away any loose meat and taking the cleaver to the neck end to remove it at the first rib. I entirely trimmed off the flaps of belly and cut through the rib cage all the way down to the meaty back, I used poultry shears to do this. The saddle and ingredients to the marinade are shown to the right (the garlic and juniper berries are missing.) The liver is still attached in that photo, however I carefully removed it and put it aside (to be used in the next recipe in this series.)

Hare has a rather tough membrane under the skin on the back and I wasn’t sure if I should remove this or not. In the end I decided not to and since the hare turned out so well I’ll stick with this approach in future. It means that marinating the hare may not be so effective maybe, but maybe the membrane does a good job of keeping the meat so moist and succulent! What I did do was thoroughly clean off any traces of hair and blood under a trickle of water then pat the saddle dry with plenty of paper towels.
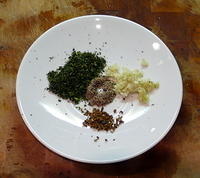
Marinade Herbs

The ingredients for the marination are:

1 ~600g
hare saddle
⅓ cup
50/50 light and extra-virgin olive oil
3 sprigs
lemon thyme (4 o’clock above, 10 to right)
3 sprigs
common thyme (7 0’clock above, 10 to right)
3 sprigs
oregano (12 o’clock above, 10 to right)
2
garlic cloves (2 o’clock to right)
6
juiper berries (6 o’clock to right)
1tsp ground
black pepper (centre of both photos)
Oily Hare

The preparation of herbs and spices is shown in the photo to the right, they were all fairly finely chopped. Then the herbs were added to the olive oil and ⅓ of the oil spread onto a sheet of plastic wrap big enough to thoroughly wrap up the saddle. The saddle was placed on this oil then another ⅓ was rubbed all over it before tipping the final ⅓ over the top and thoroughly wrapping it up. This was left to sit in a corner, after an hour I turned it over and at the same time made the dumpling dough…

Yvan’s Yeasty Herby Dumplings
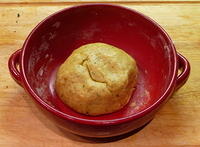
Dough!

This dumpling recipe is something I just threw together, it’s pretty simple. All the dumpling recipes I could find in the books I have either used baking soda or no raising agent at all, I wasn’t so happy with this idea and decided to try a yeasty butter dough instead, it worked out well. This recipe made enough for two little dumplings each to go with the hare (but we left one each for the next day) plus two more each to go with the casserole I later made with the hind-legs.

I’ve pulled this recipe out as separate from the roasting to reduce the overall complexity of this entry. However the dumplings were prepared and cooked at the same time as the roast, see the timeline at the bottom of the entry.

5g
dry yeast
150g
plain flour
50g
unsalted butter (room temperature or it’ll be too hard)
20g
extra virgin olive oil
5 sprigs
lemon thyme
3 sprigs
oregano
1/2tsp
salt
1tsp
ground pepper
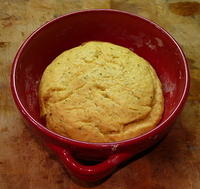
Dough is Risen

First, about 5 minutes in advance, put the yeast in a small ceramic dish and add about 30ml of lukewarm water. Once the yeast has turned frothy you can get on with making the dough. Into a separate dish place the flour, butter, and EVOO. Rub together with fingertips until well combined – the consistency should be crumbly and granular (“like breadcrumbs” the books usually say, it’s not a very accurate description I think.) Pull the leaves off the fresh herbs and chop finely, then add to the flour mixture. Also add the salt, pepper, and yeast liquid. Mix together well, with hands, until a soft dough is formed. I’ll cheat here and say the dough “should be like a soft shortcrust pastry dough”, and thus leave those who don’t make pastry mystified! It should almost be sticky, but not quite. It must be kneedable, since that’s what you’ll do next. Give it a 5 minute kneed on a smooth surface (since the dough is oily the surface shouldn’t need flouring or oiling.) If you do find it is too gooey carefully add more flour, alternately, if it seems too stiff add a little lukewarm water.

Ball up the dough and place into a bowl that’s a good three times the size of the dough-ball. Cover by placing inside a shopping bag and leave in a warm spot for an hour.
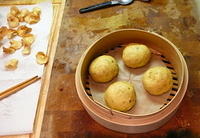
Into the Steamer

Just before you get on with preparing the hare (after putting the potatoes in the oven, see below) pull out the dough and give it a good kneed before breaking it into 8 evenly sized pieces and ball them up. To make the balls I pinch the dough into the bottom to avoid having creases on top, which would open up during cooking. These balls just sat up the back of my chopping board to puff up a little while I prepared the rest of the roast (you can see them sitting there in the parsnip photo below.)

As soon as the saddle was removed from the oven (below) I got four of the dumplings into a bamboo steamer over some simmering water in a wok. They steamed for 10 minutes and were then removed to a plate and plonked under an overhead grill to crisp up while I finished off the sauce and presented the rest of the meal for serving. Be careful here! I crisped them up a little too much, but they were fine. See the photo at the end of this entry, or the beginning. The four uncooked dumplings went into the fridge to be cooked another time.

The roasting, shallow-frying, and reducing

The main event, yet the least complicated! The roasting of the saddle is actually very quick to get the lovely rare and juicy end-product I was after, but the total roasting time was somewhat longer as required by the vegetables. The inputs to roasting (and sauce, and parsnip chips) were:
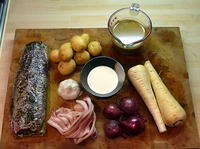
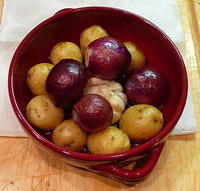
Ready for Roasting
8
new potatoes
4
small red onions
1 whole head
garlic
1 ~600g
marinated hare saddle
6 rashes
unsmoked streaky bacon
plenty
light olive oil for the vegetables
1 medium
parsnip (two are shown, but I only used one)
plenty
groundnut (peanut) oil for shallow-frying
250ml
rich hare stock (prepared earlier)
50ml
double cream

Roasting

Roasted Vegies

Pre-heat the oven to 200°C and get plenty of lightly salted water into a saucepan on the stove and bring it to a boil. Throw the potatoes into the boiling water for 5 minutes then drain and let dry in a colander. When the potatoes are dry (help them a little with a tea-towel maybe) place into an oven-proof dish into which they’ll fit fairly snugly with just enough room for the onions and garlic to be added later. Coat well with oil and let about 5mm of oil sit in the bottom of the bowl, grind over pepper and salt then into the oven for 30 minutes!

When the 30 minutes is up pull the sizzling potatoes out and toss in the oiled up onions and head of garlic, straight back into the oven with this lot and turn it up to 220°C.

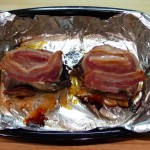
Now remove the hare saddle from the plastic wrap and place back-upwards in a roasting pan. Bard it with the streaky bacon, a typical rasher will be the perfect length to place lengthwise down the saddle (photo lower-right.) I plated each strip over the other working from the bottom up, then wrung all the excess oil out of the plastic wrap over the top of this.
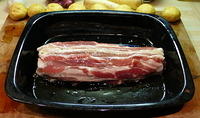
Hare Barded

The saddle now goes into the 220° oven to sizzle, but a mere 10 minutes later you pour the stock into the pan (not over the saddle) and turn the dial down to 160°C. A further 15 minutes and the saddle is done! This will give you rather pink meat as shown in the photo at the end of this entry, if you want it less pink go another 10 minutes (bit I think it’d be a shame.) Pull the saddle out of the oven and put out of the way in a corner while you finish off everything else. Leave the oven on with the vegetables in it, until either you’re ready to serve or you have to displace them to brown the tops of your dumplings. While the saddle was roasting you were simultaneously sorting out those parsnip chips…

Shallow-Frying
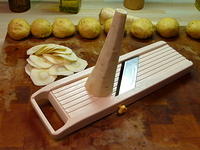
Chipping Parsnip

The best way to make the chips shown is to use a mandoline to slice the parsnip really, around 1mm, thin (I have a cheap Benriner mandoline that I’m happy with so far, there’s many to choose from though.) You could also do this with a nice sharp knife, but it’s hard going! Yet another approach is to use a peeler to make long chips by peeling through the parsnip down its length, this is the way I remember my mum doing it and it can result in quite attractive curly/twisty chips!

To do the shallow-frying put plenty of oil (at least 2cm deep) into a small frypan or saucepan. Heat this oil up until the point where a bit of parsnip dipped into it will bubble vigorously. Shallow-fry the parsnip in batches so that the pieces only overlap a little at most, it took three batches for me to do one parsnip in a 19cm pan.

Fry them until they start to turn golden around the edges then carefully flip them all over. When they’re golden all over remove them from the oil and place on some paper towels to de-oil, when they’re all done sprinkle with a little salt. I recommend using chopsticks to flip and remove the chips – make sure they’re not varnished ones though! Be very careful with very hot oil, one small safety measure I employ is to always make sure I use one of the rear burners on the stove for heating oil.

Reducing
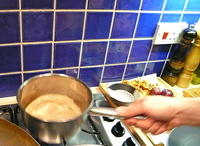
Thickening Up

We’re almost done. The vegetables are probably out of the oven now, the dumplings under the grill, the chips sitting on paper towels, and the saddle resting in a corner.

All we need now is a sauce, this is an easy one! Pour the juices from the roasting dish through a sieve into a small saucepan and add the double cream. Get this bubbling away vigorously and reduce until it has the consistency of thickened cream. That’s it, easy like I said. Pour into a dish with a spoon, or a small pouring jug, for serving.

It All Comes Together
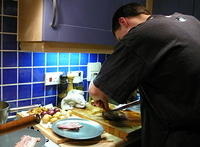
Carving the Saddle

It’s really been a crazy marathon up to this point, at peak I had three different things going on at once (roasting hare & veggies, steaming dumplings, and shallow-frying parsnip chips.) Things are coming together nicely now, the hare saddle will have been out of the oven for about 20 minutes but still be warm and ready for carving.

The first thing I did was cut off about 3 inches at the narrow end of the saddle, including the barding bacon. This I put aside to be used the next day. Then I lifted the strips of bacon off the remaining bulk of the saddle and laid them down on the serving plates (which had been in the oven to warm for a short while.) Now take a nice sharp knife and carve good 3 to 5mm thick slices off the back of the saddle, you may wish to peel off the membrane first but I didn’t bother (it should come away easily if you choose to remove it.) You’ll get 4 or 5 nice slices off each side. I laid these out over the bacon, this can kind of be seen in the photo to the right if you look at the larger version.
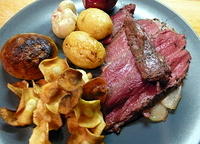
Ready to Serve

When you’ve carved strips off each side down to the bones, flip the saddle over and carve out the two inner fillets. These inner strips of meat are equivalent the fillet-steak of beef, they really were the most delicious little morsels of hare meat too. Lay out each little fillet over the top of the slices of meat on the serving plate (the strip laid at 90° to the rest of the meat in the adjacent photo.)

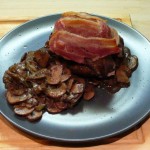
Now add an onion, a couple of potatoes, a dumpling or two, half a head of garlic, and a handful of parsnip chips. You can drizzle some sauce over the lot, or leave this to be done at the table.

Serve!

This hare was probably the best bit of meat I’ve eaten in my life, it was that good. I’ve already praised its virtues though, so I won’t go on any further. The dumplings were interesting and turned out quite well, rather light, rather buttery and certainly yeasty. They retained the lemony flavour of the thyme and did their job well: sauce mops.

We enjoyed our harey roast with a good organic dry scrumpy cider and this teamed up well with the flavour of the meat and overall richness of the meal. If it was to be wine I’d probably go for a lighter red, maybe a pinot noir.
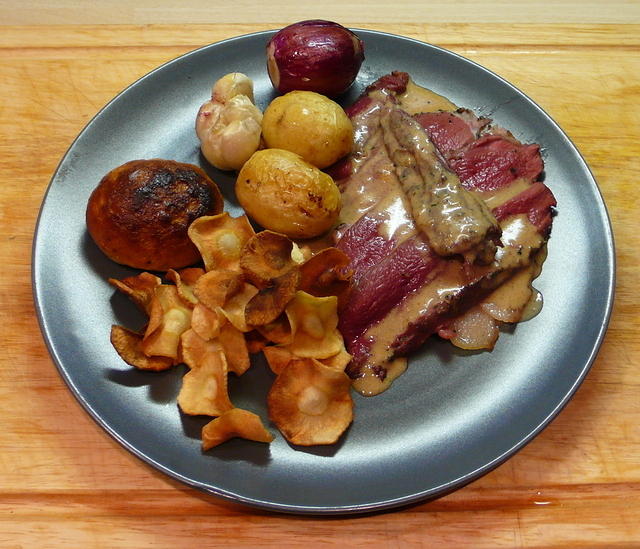
Ready to serve

Tail of the Hare

Leftovers

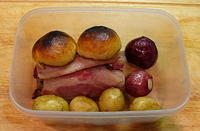
Along with the excess 3 inches of saddle we had 4 potatoes, 2 onions, 2 dumplings, and about 2 tbsp of sauce left over for another time. Most of this went into the harey salad I prepared for lunch the following day, which is a recipe for another time (next in my harey series.) The leftover dumplings actually got sliced up and pan-toasted with eggs for breakfast the next day, so didn’t make it to the salad. The four uncooked dumplings sat wrapped in plastic in the fridge alongside the hare hind legs until used in the final recipe in the series, a harey casserole.

I picked at the filleted bones and nibbled off any larger chunks of meat, I couldn’t help myself. Then the bones went into a freezer bag and joined some other leftovers on the “stock shelf” in the freezer.

As usual there’s a full album of photos for this recipe including many I couldn’t reasonably fit alongside the words.

Finally, here’s a rough timetable to give an idea of how all the above fits together. It isn’t exactly the timing I followed but it’s a close enough blueprint (I actually made the dough way too early, but that’s completely unnecessary.)

18:00
marinate hare
19:00
flip hare and make dumpling dough
19:30
potatoes into the 200°C oven
19:35
kneed dumpling dough and make individual dumplings
20:00
onions & garlic & hare into the 220°C oven, slice the parsnip
20:10
pour stock into hare and reduce temperature to 160°C
20:15
start shallow-frying the parsnip, get water steaming in wok
20:25
remove hare from oven, start steaming dumplings
20:35
move steamed dumplings to grill, remove vegies from oven
20:40
start reducing pan juices mixed with double cream
20:45
slice hare, present everything on plates, serve!
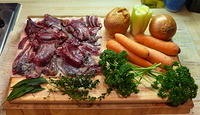
Harey Stock

Note: This entry has been restored from old archives.

Preamble, hare rama hare rama

This is my first harey recipe, and covers the making of a stock that’ll be used in two other harey recipes. It’s a pretty straightforward thing to do and a logical starting point. Unfortunately we’re busy cleaning the apartment this weekend as estate agents will be in on Monday to do an assessment and take photos… thus I may not get any other recipes out until next weekend. (We’ve decided that it is time to move into something that isn’t an apartment, and the owner has decided that it’s time to sell.)

Anyway, everyone should know how to make a stock and if you don’t you should learn! It really is rather trivial. These days you can get pretty good stock from the supermarket, and I mean the stuff in the fridge not the dreaded cubes (which I do use from time to time and I always have a few kicking around in the cupboard.) However, I do think you can make a better stock. It’s not just about better though, it’s about making optimal use of your food. Bones the butcher would otherwise throw out (these days), leftover roast chicken, whatever’s about really. Making stock is a skill worth learning and it’ll serve you well in the dark days ahead.

Of course this isn’t going to be a very typical stock, but you can look at the recipe below as a template. For example, you could replace the hare parts with a broken up roast chicken carcass and some chicken wings (from some good free-range birds!) The stock described here comes out pretty strong and quite gamey… good for recipes involving the rest of the hare but probably not much good for other cooking.

Input

Ingredients

I’m going to be a bit rough with the ingredients list here, precision isn’t necessary. The photo on the right really gives all the information you need, I could probably leave the list below out! Please use happy vegetables for happy flavours… save the bendy carrots for some chooks, local horses, or something. (And don’t buy so many that you let them get into that state next time… happens to me all the time, not having much livestock nearby I eat them raw before they can get too bad.) The ingredients can be multiplied by as many times as you’d like to make more stock, it’s great for freezing (and you can reduce it first to use less freezer space.) I don’t recommend trying to make it in a lesser quantity though, this is as small as I’d go for making a stock.

550g
hare forelegs and offcuts
drizzle
light olive oil
3 medium
carrots
2 medium
onions
3 sticks
celery
3
fresh bayleaves
6 sprigs
fresh thyme
handful
fresh parsley

Algorithm

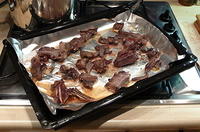
Browned Hare Bits

First, preheat your oven to 220C. Ensure hare bits are clean, pat dry if wet, and toss with some oil in a bowl. Spread the bits around a baking tray and place in the hot oven for a 15 minute sizzle. Meanwhile peel the carrots (or don’t if they look pretty good) and chop them into about 3 or 4 pieces. Then quarter the onions, and cut the celery into 2 inch lengths.

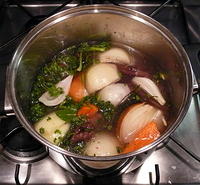
Ready for simmer'n

After the hare bits have sizzled for 15 minutes remove from the oven and place the hare and all juices and scrapings from the pan into a smaller sized stock pot (22cm in my case.) Throw in the herbs and then pack in the vegetables, pack everything down as tightly as you can. The idea is that you want as little liquid as possible. Flush any remaining bits and oil from the hare roasting pan into the stock pot with about 500ml of water. Then top up the with just enough water to barely cover the content (note that the veggies may float a little, be careful not to add too much water.) In the end I added about 1.5l (photo left.)

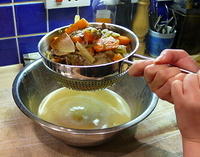
Urgh, the strain!

Bring the pot to a gentle simmer, then place it on the smallest flame your stove can do. If, even then, it simmers any more than lethargically you might want to, assuming you have a gas stove, get yourself a simmer mat/ring for future simmering occasions (a fallback option, if you use an oven-proof pot, is to put it in a 120C oven after getting it to simmering point on the stove.) Now you can just leave it alone for about 3 hours, though you might want to give it a good stir every hour or so (I did, but it probably doesn’t matter.)

When the simmering time is up take the pot off the heat and give it a good 30-minutes to full-hour to cool down. When cool enough to handle strain the stock through a large-hole sieve or colander. Give it a good pressing to get out as much fluid as you can without pressing mashed vegetable through the holes in your strainer. Now strain back into the rinsed stock pot through a fine sieve (if you’re after a clearer stock you could do another step straining through wetted muslin, more about that some other time maybe.) Put the strained stock back onto the stove and re-heat/reduce as required for your purposes. I got about 1 litre of stock out of this which I then reduced down to 500ml of fairly rich stock. Alternatively, refrigerate or freeze the stock for some future cooking endeavour!

Oh My Hare!

Note: This entry has been restored from old archives.

Hares have been associated with gods, goddesses, witches, fertility, and all manner of other myth and legend. For me, from this night onwards, hares are associated first and foremost with the best animal flesh I have ever eaten. Seriously, I should just give up on the whole food thing now as I don’t think I’ll ever cook myself something this good again. I’ve had grouse, considered by some the best thing on two legs; I’ve had wagyu beef, considered by some the best thing on four legs… Hare is, I suppose, somewhere between the two and four legged and fittingly, in flavour it is much like grouse, yet in tenderness and absolute melt-in-the mouth divinity it is much like wagyu. Admittedly I probably haven’t had the best grouse there is, and never having been in Japan I’ve certainly never had the best wagyu there is. Though, my first hare ever, bought from the local butcher, have I had the best hare there is?

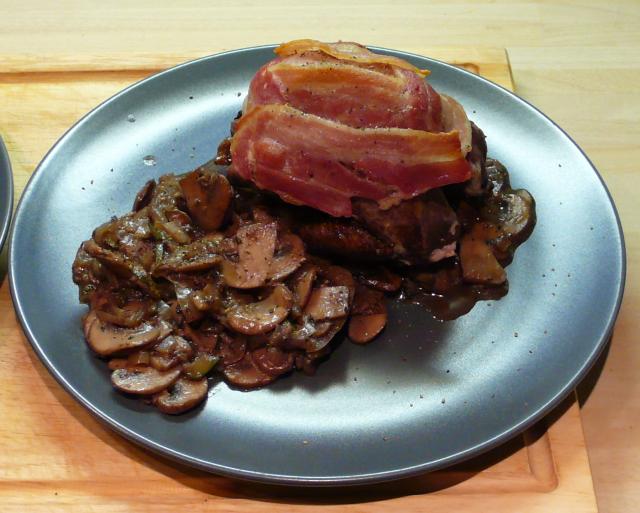
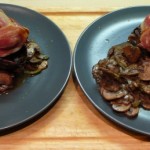
I’ll write up the full details of my roast hare experience in time, it’ll probably take a week or two given how little “spare” time I tend to have. It was quite a production as well, so isn’t going to be simple to get into words. In the meantime the following photo will have to suffice.

Ready to serve

Hare Krishna Hare Krishna
Krishna Krishna Hare Hare
Hare Rama Hare Rama
Rama Rama Hare Hare

Harey Weekend

Note: This entry has been restored from old archives.

It’s been a pretty terrible week for me. On Tuesday evening I lay down to sleep and suddenly had a sore throat, very strange. Seriously, there wasn’t a hint of a problem until I lied down and then within minutes it felt like I’d swallowed a caltrop. I’ve had the throat all week, progressively getting better while my head got worse. I tried to describe how I felt to Kat and came up with “it feels like I have a nest of insane, woolly ferrets running around in circles in my head.” All great fun, I assure you! sigh I never used to get colds and their ilk, must have stronger bugs here in the UK (admittedly this is just the second cold I’ve had in two years, so it could be worse.) Anyway, enough whinging, pathetic, weak human!

I’ve been looking forward to the weekend. In the preamble to my latest lamb shank casserole recipe I mentioned that I’d ordered a hare. Well, this morning we picked up our hare from Hamblings, it was only 10 quid! An animal fit for roasting that’d had at least a good 5 days hanging. Unfortunately we don’t know exactly how long it was hung for, the butcher said 5 days was the worst-case. Ideally a hare should hang for at least 7 to 10 days, and it’s pretty cool at the moment so longer would be better. The butcher got it in on Tuesday (it’d been hung prior to this), hung it for another couple of days and it was skinned and paunched on Thursday. I picked up some unsmoked streaky bacon from him too. I tried to get caul fat but he told me it’s “like gold-dust”, and said that’s the way it’s been since abattoir work became piece-work. Things that take too much time to do (and don’t yield much money) just aren’t done any more.

The butcher separated the hare’s legs from its saddle for me, then we wandered back home, via the veggie shop, to admire the goods. The first thing to hit me was the smell, this is one pretty pungent beast! Not a bad smell, not to my nose, but I think some might find it a bit nauseas. Anyway, you can admire the goods without the smell, as usual I’m taking plenty of photos!

Mr Hare

The meaty back legs I’m reserving for a casserole tomorrow. The saddle I’ve trimmed up and will roast tonight. The front legs and trimmings have gone into a pot with vegetables and herbs to make a game stock that’ll be used for both the roast and the casserole.

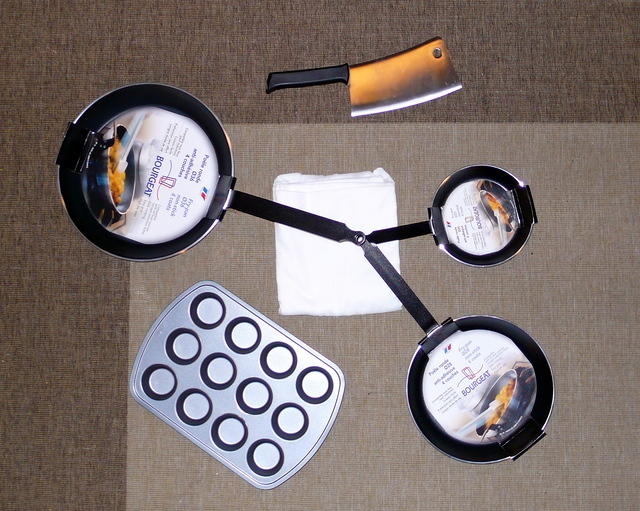
In other news, I put an order in with a catering company called Nisbets on Thursday. It was time for a new frypan, my old one I brought over from Sydney has reached the end of its non-stick life. Based on a recommendation from the much worshipped “Hugh book” I went for the Bourgeat brand (Nisbets was also recommended by the book.) Hugh described Bourgeat as the “current chef’s favourite” (in 2004), that seems a pretty good rating. I went all-out and ordered three different sizes! (20cm, 28cm, 3-eff’n-huge-6cm) I also got a nice big and heavy cleaver for butchering, well, anything really. Plus a length of muslin (something I’ve had trouble finding anywhere else), and a good solid muffin tray since we didn’t have one (it’s not generally going to be used for muffins though!) I can report that Nisbets’s “next day delivery” (their cheapest delivery option) really is next day! Here’s the loot:

Nisbets Goodies

I’ll be writing entries about the making of the stock, the roasting of the saddle, and the casseroling of the legs. Though, as usual, it will probably take a week or two for me to get the entries done, spare time is a rare commodity.

Roast Wood Pigeon with Braised Vegetables

Note: This entry has been restored from old archives.

Prologue

Roast Wood Pigeon with Braised Vegetables
Coo coo — bang!

I’ve decided to try cooking game with greater variance and frequency. My motivation stems from The River Cottage Meat Book and was recently reinforced by the surprising range of game available at a new local supermarket. To-date my game cooking experience has been rather limited, just venison and rabbit. The former possibly farmed, the latter certainly farmed (so the link to “game” is tenuous at best). If you’re unfamillar with game then the Hugh book is a great start, but game is just a small part of it’s coverage and I can recommend Clarissa Dickson Wright’s (one of the “Two Fat Ladies“) & Johnny Scott’s “The Game Cookbook” as an alternative starting point that is also a great read.

I fear that the supermarket-with-game situation will be short lived due to a lack of demand, will enough locals buy game? Anyway, Waitrose is not the be-all-and-end-all of game, far from it! While the High Street butcher showed little promise on the game front (admittedly I’ve only tried asking for rabbit, in which case all they had to offer was farmed rabbit from China!) I recently found out about a different butcher nearby that ticks all the right boxes, I picked up some tasty duck breast there on Thursday and went back today for a couple of wild rabbits. Wabbit stoo tomorrow!

So, on Tuesday I decided to give a bird, or two, a whirl. I trundled over the tracks to the supermarket intending to get a couple of partridges. Alas, there were none! Luckily there was Wood Pigeon, the other birds available were far too large for one each (pheasant, mallard, goose!). Don’t fear, Wood Pigeons are not the same thing as the greasy rats-of-the-sky very familiar in Sydney (and London). I think that city-pigeons might be Rock Dove’s (Columba livia) or maybe just some sort of mongrel, Wood Pigeons (Columba palumbus) are related though.

Let us get on with the recipe.

Ingredients

Main Ingredients
Coo coo — bang!
  • 2 Wood Pigeons (~280g each, marked on packet as 250g)
  • 6 rashers of Streaky Bacon (120g)
  • 1 small Zucchini (90g after tidying & chopping)
  • 1 medium Onion (200g after tidying & chopping)
  • 12 White Mushrooms (410g after tidying & chopping)
  • 1 tbsp Maple Syrup (10g)
  • 150ml Dry Red Wine
  • 2 cloves of Garlic
  • 6 Juniper Berries
  • 1 heaped tsp of dried Oregano
  • 2 tsp fresh ground Black Pepper
  • 2 tbsp Spiced Mead, or Port, or Sherry
  • Salt

Method

Chopped Vegetables
Chopped Vegetables

Determining the right baking parameters for the birdies was a little difficult. The packaging recommended 40 minutes at 160 degrees, while Hugh’s Meat Book suggests up to 25 minutes at 230 degrees. I stuck to the latter, since the Meat Book is well on it’s way to becoming my preferred deity. If anything I think that critters of this size could have done better with 20 minutes rather than 25 (25 was the upper threshold for a “large” pigeon, but I don’t know what “large” is for a pigeon!). So, first step, preheat oven to 230 degrees.

Next heat the spiced mead, just bung it in a teacup and microwave it. Crush and halve the garlic cloves, crush the juniper berries, and throw both into the heated mead along with a teaspoon of pepper and a couple of grinds of salt.

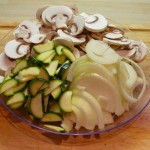
Now prepare the vegetables. Trim mushroom stems, if necessary, and slice. Top and tail zucchini, halve lengthwise, and slice. Halve, top, and tail the onion and slice. (Photo right.)

Pigeons ready to bake
Oven Ready

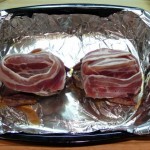
Rub the birds with some olive oil, not dripping with oil, just glistening. Now place them breast-up in a roasting pan and get out the bacon. The bacon is to be wrapped over the breast of the bird, the idea is to provide a steady stream of fat to reduce moisture loss, this is known as barding. No special technique is required, the image on the left shows the barded birds. With this done spoon the mead mixture, which should have been sitting for at least 5 minutes, into the cavities of the bird sharing out the garlic and berries evenly. Whack it in the oven! Make a note of the time, they’ll be ready in 25 minutes.

Use a large heavy based pan to deal with the veggies. Add a tablespoon of light olive oil and get it nice and hot, the oil should shimmer and run like water but not be smoking. Toss in the veggies! Keep tossing them around and let them brown a little. After about 5 minutes of this push the temperature right down and add the wine, maple syrup, remaining pepper, and about 50ml of water (or stock if you have some handy). Put a lid on the pan and let it lightly sizzle for about 10 minutes, stirring on occasion. Turn off the heat and have a quick peek at your birds to make sure nothing untoward has happened.

If there’s some time remaining for the birds pour some wine and marinate the
cook.

Braised Vegetables
Braised Vegetables

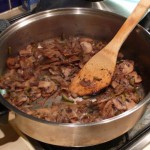
Remove birds from the oven, turn it off and place a couple of plates in it to warm. Get a medium flame going under the vegetables again, and then continue self-marination for 5 minutes. Remove birds to a temporary holding dish (probably best to have warmed this in the oven too) and pour juices from the pan into the vegetable pan, add about 50ml of water to the pan scrape, swirl, and tip into vegetables. Now push the vegetables to high heat and boil away liquid until vegetable mix resembles that shown in the photo to the right, there should be very little liquid remaining. Grab the hot pates from the oven (careful!) and divide vegetable mixture between them. Place birds on top of vegetables, add a couple of grinds of pepper, serve! Simple!

Nutrition

This is a hard sort of meal to deal with on the Nutrition front, mostly thanks to the pigeon. The Waitrose nutritional information was for “when prepared as directed”, but this would involve weighing the beasts after baking them and didn’t specify whether the weight should include bones or not! I took a punt at it by calculating the raw consumed weight as the raw weight minus the leftover carcass parts after eating (approximating a total of 200g). I had little luck finding nutritional stats for raw wood pigeon so I used stats for “Pheasant, raw, meat and skin” from the USDA database.

So, clearly the information here must be regarded as little more than a rough approximation! Here’s goes:

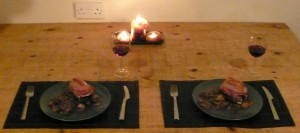
Served
Game’s Up!
Thing Value
Energy 672 kcal
Carbohydrate 19.4g
Protein 61.0g
Fat 38.5g
  Saturated 5.5g
Dietry Fibre 3.7g

Epilogue

We found the pigeons to be mild in flavour and maybe a little dry, but the wet vegetable mixture covered for any dryness in the meat. Next time I’d probably give them 5 minutes less time in the oven. That said, the sky-rats are certainly to be repeated!

Blueprint Café

Note: This entry has been restored from old archives.

Grouse grouse mate! Who remembers “grouse”? When I was growing up in a south-west WA surfie town in the 80s the word was nearing the end of its life. Gone the way of many recycled words, back into the compost. To say something was grouse was to say it was knarley, cool, or these days, way mad. Well, I think, but these things change from year to year and place to place, and I’m getting a bit long in the tooth to keep up. Fully sick mate, says Kat, bloody Westies. There’s a word that needs some context: Westie. I’m talking Sydney’s western suburbs, but from a geographical perspective I’m far more westie than anyone from, say, Penrith. And what can all this mean to someone in London anyway! Let alone any other part of the world.

On with the topic! On Saturday we were hunting game, unfortunately this was with a web-browser rather than a shot-gun. You got game? The game restaurant in London appears to be Rules, but when I tried to book the response was that I was about a month too late to book at this time of year. So we hunted… Eventually finding ourselves with a reservation at Blueprint Café. Some note has to be made regarding the process of booking here. It was all done via a web-site called D&D London, which handles several other popular London restaurants as well. How very modern and convenient. But I don’t really like it, I tried booking over the phone first but got a message saying to try the website (this was at 11AM). This web lark takes some of the fun out of booking a table at a decent restaurant.

So at 18:00 we rock up. The game on offer was not extensive, less prevalent than on the online menu (but game supply is unpredictable). We caught a couple of game dishes, a mallard entrée and, the pièce de résistance, grouse.

Kat didn’t order an entrée, as it transpired this was a wise decision. I, on the other hand, couldn’t resist the Salt Mallard served with raspberry conserve, quince paste, and watercress. The mallard was exquisite, cold medallions of deep red breast flesh. Maybe the raspberry and quince flavours (and sweetness) were a bit much for it, but since they were “on the side” this was a small concern. I mopped up remains with some bread, no worries!

For main course I had the Welsh Blackface Mutton. The mutton was perfect, baked to succulent tenderness, but the “parsley and mustard crust” was far, far too mustardy. As if they were trying to hide the fact that the mutton tasted like mutton!

Kat’s main course was grouse. A baked bird served with handmade crisps, salad leaves, raspberry sauce, and traditional giblets-on-toast (grouse on top). Alongside was a bowl of “bread sauce” which I can best describe as a lumpy and sweet béchamel, this complemented the grouse well. Grouse is described, by Hugh Fearlessly-Eatsitall, as having “a unique, herby, heathery flavour”. I’m not familiar with heather, but “herby” is spot on, this was one tasty bird. Tender, pink-red, and a real pain in the butt to eat! Kat made a great effort then I took over and did what I could with the carcass, it’s a complicated meal but well worth the effort. I even found a piece of lead shot in one of the legs! (Do you think they deliberately leave it in, or insert one just in case even?). I wasn’t keen on the crisps (maybe if they were parsnip I’d be happier) and the pile of what seemed like fried bread-crumbs. But really, everything in addition to the bird is just fluff. It was good.

A warning that the grouse would take three times as long to eat as the mutton would have been appreciated.

We were advised to order sides with our mains, in my case this was warranted as all I had with my mutton was a few leaves. Kat certainly had no need of a side, her meal already came with plenty of cress. She ordered a mixed leaf salad, which was fine. I ordered Purple Broccoli Spears, which were a bit too mushy for my tastes.

Dessert? We had to. I had a Quince and Apple Shortcake, it was too sweet and not quincey enough. More quince and normal cream instead of the sweet muck and it would have been much better. Kat had Orange Polenta Cake with Vanilla Bean Icecream and Poached Pear, hard to go wrong with this one, perhaps on the sweet side again. On sweetness I must note that we both very rarely eat sweet foods, so we may be over-sensitive to sweetness.

We had some wine too, “Primitivo” from Puglia at 5 quid per glass. Good eating wine.

In the end the meal cost us 90 quid, including 15 quid for three glasses (175ml) of wine and 10 quid for “12.5% discretionary service charge”. (The service was good, though maybe a little thin on the ground.) This is quite reasonable for London eating, I expect to pay over 100 quid for a night out at a London restaurant. Kat didn’t have an entrée, though she did have the most expensive main course on the menu, 22 quid, this is around what you’d expect for grouse.

My regrets are dessert, mushy broccoli, and the mustardy crust. But the evening overall was a success thanks to the duck and the grouse. There’s something to be said for the location too. Above the Design Museum (though that doesn’t excite me much) and right next to the Thames. If you’re near the glass frontage, we were right against it, you have a view of the dark glittering expanse of the Thames (which would be a view of the green murky and debris covered expanse of the river if it were daytime). Downriver the Canary Wharf skyline dominates as the river curves down to Isle of Dogs. Upriver the nearby Tower Bridge steals the show. If you can get a seat by the window Blueprint Café is a perfect restaurant for the sight seer.